Blog > How to Sand and Stain Your Hardwood Floors
How to Sand and Stain Your Hardwood Floors
Monday December 2, 2024
Introduction
Sanding and staining your hardwood floors can completely transform the look and feel of your home. Whether your floors are looking a bit worn or you just want to change up the color, these processes are essential for achieving beautiful, professional results. The good news is that you can handle sanding and staining on your own with the right tools and a bit of know-how.
First, it’s important to understand why sanding is necessary. Sanding removes the old finish and smooths out any blemishes, giving you a fresh surface to work with. This step ensures that the stain and finish can adhere properly, creating a flawless appearance. Skipping the sanding phase would result in a patchy finish and wasted effort.
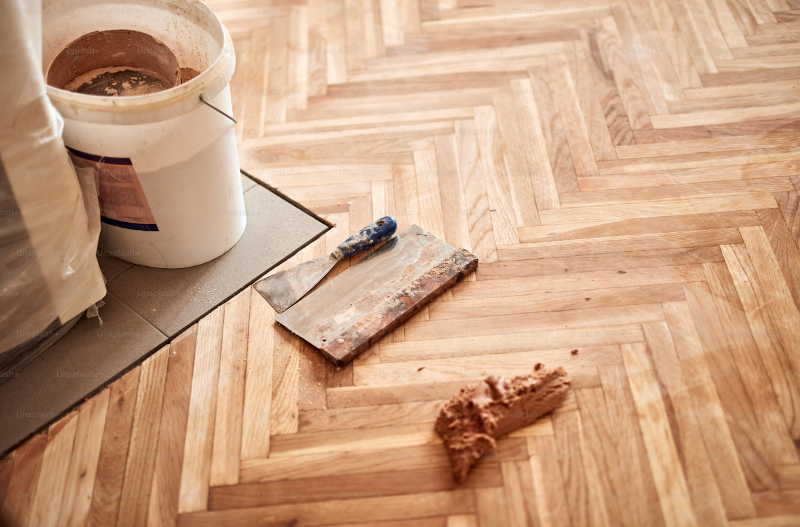
Next comes staining, which is your opportunity to add color and depth to the wood. Stains come in various types, and choosing the right one can highlight the natural beauty of the wood grain. After staining, applying a protective finish is the final step, sealing in the color and safeguarding your floors from wear and tear.
This guide will walk you through the entire process, from understanding the basics of sanding and staining to selecting the right tools and materials. You’ll learn the step-by-step techniques needed for professional-quality results, making your hardwood floors shine like new.
Understanding the Basics of Sanding and Staining
What Is Sanding and Why Is It Important?
Sanding is the process of removing the top layer of your hardwood floors to eliminate old finishes, scratches, and blemishes. This step is crucial because it prepares the wood for staining and finishing, ensuring that these products adhere properly. Without proper sanding, the stain and finish may not penetrate evenly, leading to a blotchy appearance. Sanding also smooths out the surface, making it more receptive to the new stain and finish.
While sanding may seem like an arduous task, it’s essential for a polished and professional look. By taking the time to sand your floors correctly, you create a perfect canvas for staining, which brings out the natural beauty of the wood grain.
The Purpose of Staining and Different Types of Stains
Staining is your opportunity to enhance the color and richness of your hardwood floors. Stains penetrate the wood, adding depth and highlighting the grain patterns. There are several types of stains to choose from, each offering different benefits and aesthetics.
- Oil-Based Stains: These are popular due to their rich color and durability. They penetrate deeply and are easy to apply, making them a favorite for many DIY enthusiasts.
- Water-Based Stains: These stains dry faster and emit fewer fumes, making them a more environmentally friendly option. They provide a cleaner, more transparent look, allowing the wood grain to show through.
- Gel Stains: These are thicker and offer even coverage without blotching. They are ideal for woods that are difficult to stain evenly.
Choosing the right type of stain depends on your preferences and the look you want to achieve. Whether you prefer the deep, traditional colors of oil-based stains or the quick-drying, eco-friendly nature of water-based stains, there’s an option for every project.
Tools and Materials You’ll Need
Essential Tools for Sanding
To sand your hardwood floors effectively, you’ll need the right tools. Here’s a list of essential equipment:
- Drum Sander: This heavy-duty machine is perfect for sanding large, open areas quickly and efficiently. It removes the old finish and smoothes out the wood.
- Edge Sander: This smaller sander reaches the edges and corners that the drum sander can’t access, ensuring the entire floor is sanded evenly.
- Sandpaper: Various grits are needed, starting with coarse grit (36-60) to remove the old finish and moving to finer grits (80-120) for a smooth, even surface.
- Vacuum: A vacuum is essential for cleaning up dust and debris between sanding passes, ensuring a clean surface for the stain.
Types of Stains and Finishing Products
Once the sanding is complete, it’s time to stain and finish your floors. Here are the types of stains and finishing products you may need:
Stains:
- Oil-Based Stains: Provide rich color and lasting durability.
- Water-Based Stains: Dry quickly and offer a more transparent finish.
- Gel Stains: Ideal for woods that absorb unevenly.
Finishing Products:
- Polyurethane (Oil-Based): Durable and provides a glossy finish, but takes longer to dry.
- Water-Based Polyurethane: Dries faster and has fewer fumes. Provides a clear finish.
- Wax: Offers a warm, natural look but requires regular maintenance.
Having the right tools and materials ensures that you achieve a professional-quality finish. Investing in quality equipment and products will make the process smoother and the results more satisfying.
Step-by-Step Guide to Sanding Your Floors
Preparation and Safety Measures
Before you begin sanding, it's crucial to prepare both your workspace and yourself. Start by removing all furniture and objects from the room. Cover vents and doorways with plastic sheeting to prevent dust from spreading throughout the house. Wear a dust mask, safety glasses, and ear protection to safeguard yourself.
Check for any loose nails or staples in the floor and remove them. This prevents damage to the sanding equipment. Sweep or vacuum the floor thoroughly to remove loose dirt and debris. These steps ensure that the sanding process goes smoothly and safely.
Sanding Techniques for Different Wood Types
Different types of wood require different sanding techniques. Here’s a simple guide:
- Softwoods (like pine): Start with a finer grit sandpaper, around 60-80 grit, as softwoods can be easily damaged. Sand in the direction of the wood grain to avoid scratches.
- Hardwoods (like oak or maple): Begin with a coarser grit, such as 36-40 grit, to remove old finishes and scratches. Progress to finer grits (80-120) for a smooth finish. Again, always sand in the direction of the grain to achieve the best results.
Use a drum sander for large, open areas and switch to an edge sander for corners and edges. Work methodically across the room, overlapping each pass slightly to ensure even sanding. After completing the rough sanding, vacuum the dust and proceed to finer grits to attain a sleek surface. Patience and attention to detail during sanding set the foundation for a beautiful finish.
How to Stain and Finish Your Floors
Applying the Stain Evenly
Once your floors are perfectly sanded, it's time to stain them. Start by choosing the right stain for your wood type and the desired look. Mix the stain thoroughly before application to ensure an even color.
Use a clean cloth or brush to apply the stain. Work in small sections, applying the stain evenly and wiping off any excess with a clean rag. This prevents blotches and ensures a consistent color throughout the floor. Allow the first coat of stain to dry according to the manufacturer’s instructions before deciding if additional coats are needed to achieve the desired depth of color.
Sealing and Protecting the Stained Floor
After staining, it’s important to seal the floor to protect your hard work. Polyurethane is a popular choice for sealing. Choose between oil-based or water-based polyurethane depending on your preference for drying time and finish.
Apply the first coat of polyurethane with a brush or roller, ensuring a smooth and even layer. Allow it to dry completely, then lightly sand the floor with fine-grit sandpaper to remove any imperfections. Clean up any dust and apply a second coat for added durability.
For high-traffic areas, consider applying a third coat. Each layer adds more protection and enhances the shine of your floors. Following these steps will create a strong, beautiful finish that withstands daily wear and tear.
Conclusion
Sanding and staining your hardwood floors can seem like a big project, but with the right tools and techniques, you can achieve stunning results. Understanding the importance of sanding and how to choose the correct stain ensures your floors look beautiful and last a long time. By taking the time to properly prepare, sand, and finish your floors, you not only improve their appearance but also protect your investment.
Ready to take your flooring project to the next level? Contact Luxx Flooring. Our team of experts is here to help you through every step of the process. Contact us today and give your hardwood floors the attention they deserve.